DataSource Cloud Quick Start Guide
1. Quick Start Guide
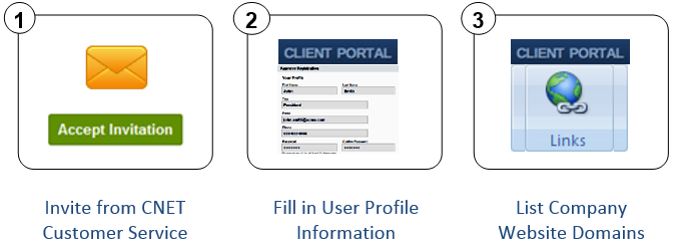
i. Account Activation
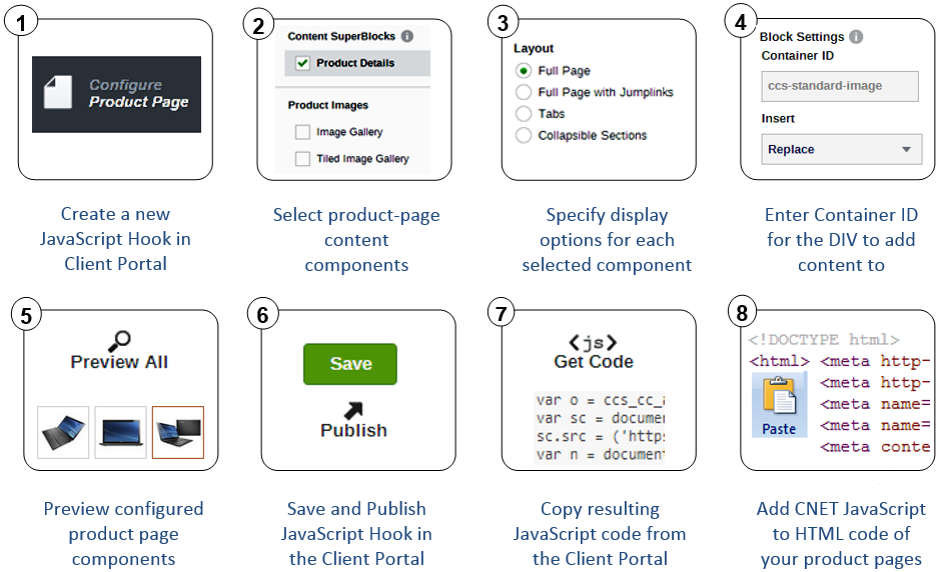
ii. Product Page Configuration
2. Account Activation
Welcome to the CNET Content Solutions Client Portal.After reading this Quick Start Guide, you will be able to publish syndicated product content directly to your website.
2.1 Accept Invitation
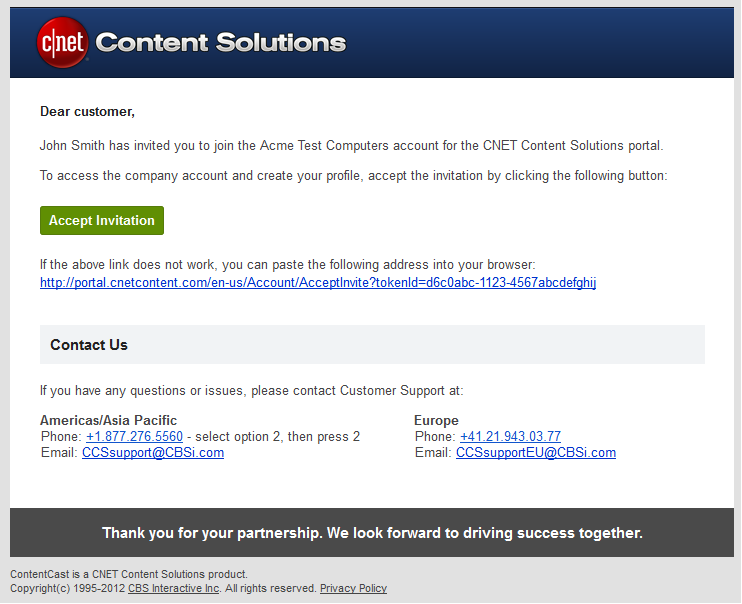
When you receive your email invitation, click ACCEPT INVITATION to begin creating your profile.
2.2 Create Profile
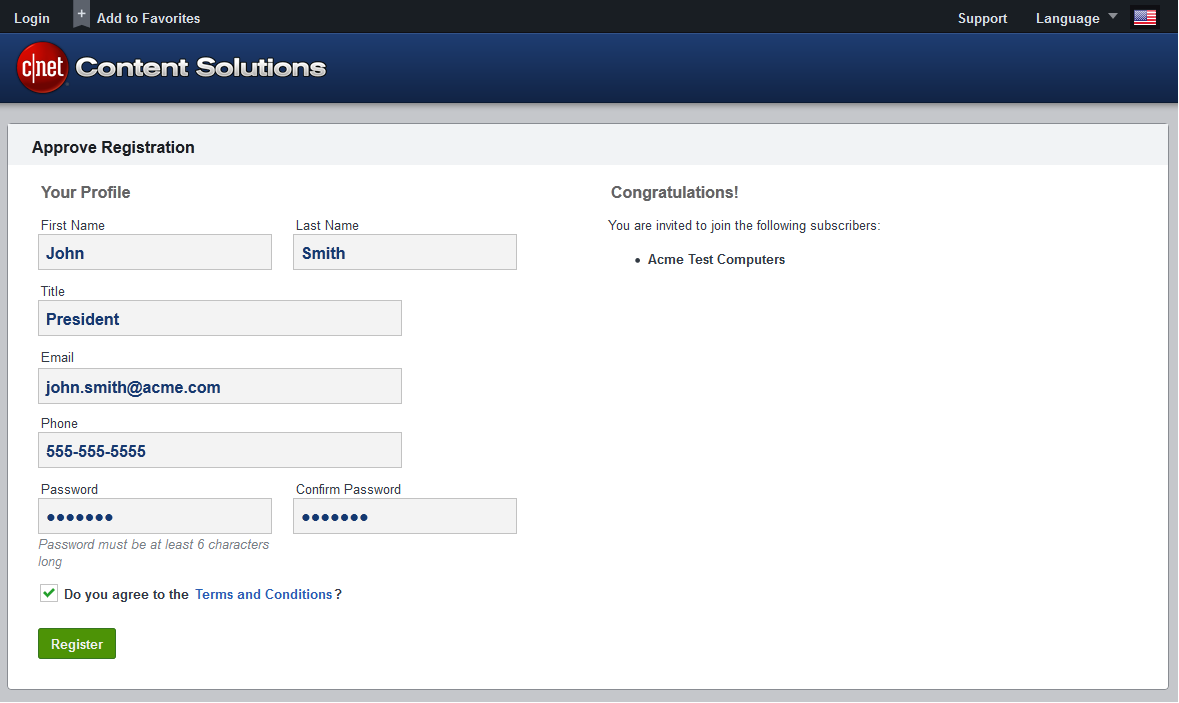
Fill in the profile with your name, title, email address, phone number, and desired password.Check the box at the bottom, indicating that you agree to the terms and conditions.Click REGISTER to continue to the main page.
2.3 Register Domains
For security purposes, the product page script will only run on domains that have been registered in the portal.
If you have a separate domain (perhaps used for staging) that is not a subdomain, you will need to register it. Go to ADMIN > INTEGRATION SETTINGS, and click EDIT to add a domain.
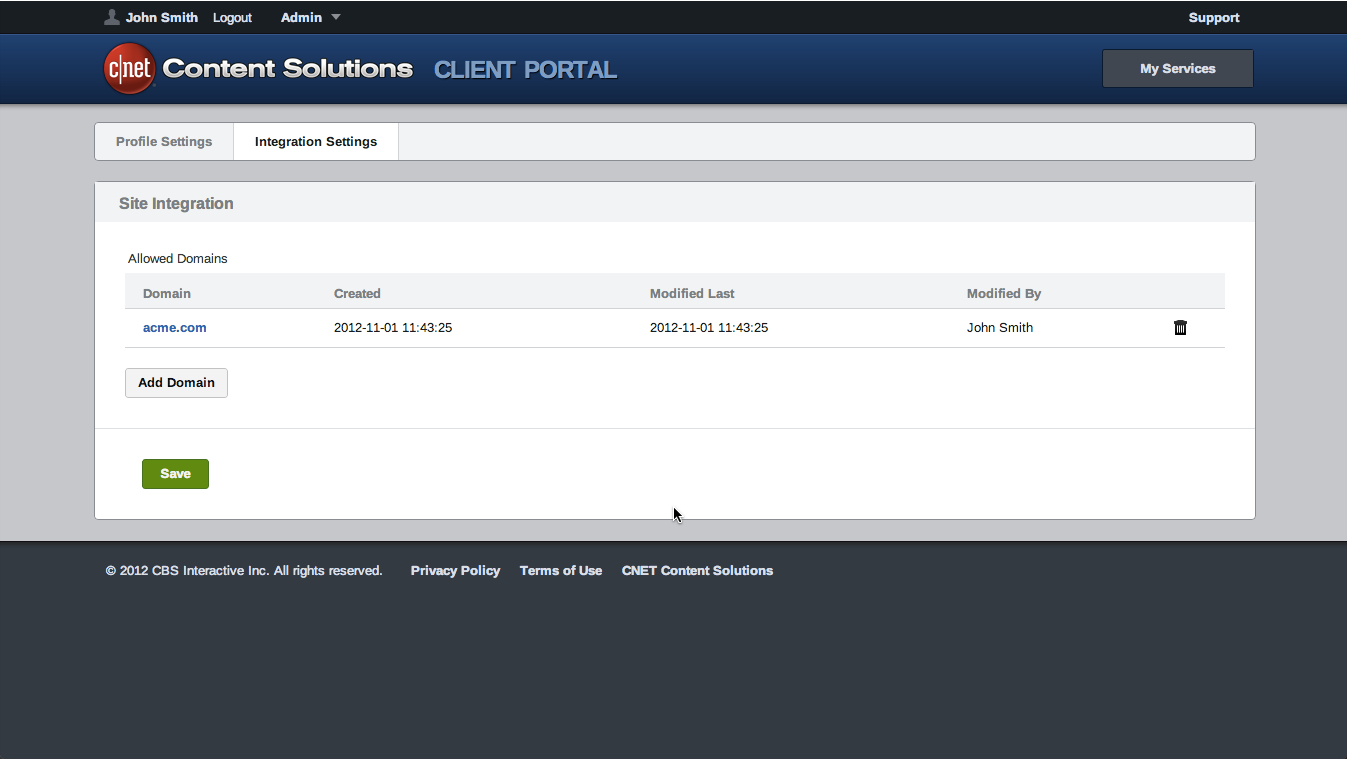
Subdomains, such as “stage.mycompany.com” or “qatest.mycompany.com” do not need to be registered, as they belong to the root domain.
After you have registered all necessary domains, click SAVE.
3. Product Page Configuration
3.1 Create New Product Page Script
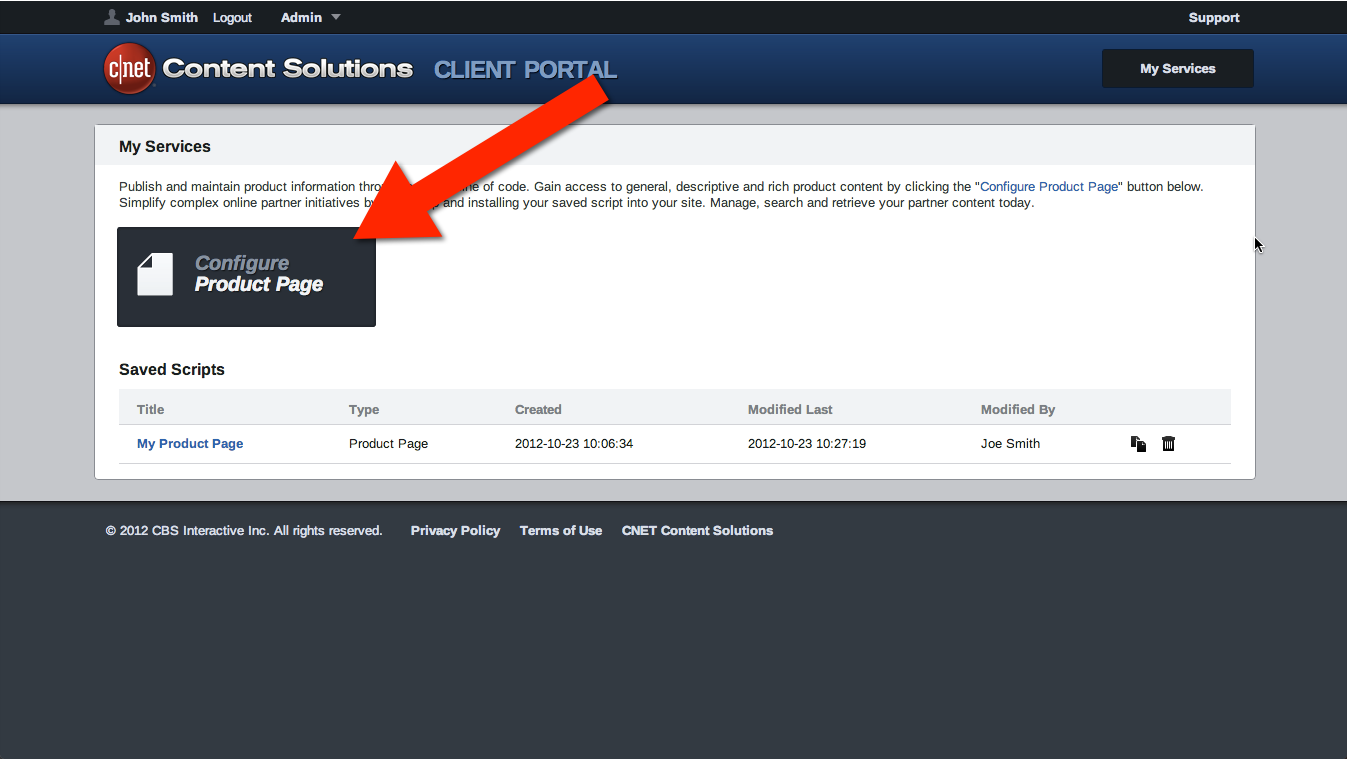
From the main My Services page, select CONFIGURE PRODUCT PAGE.
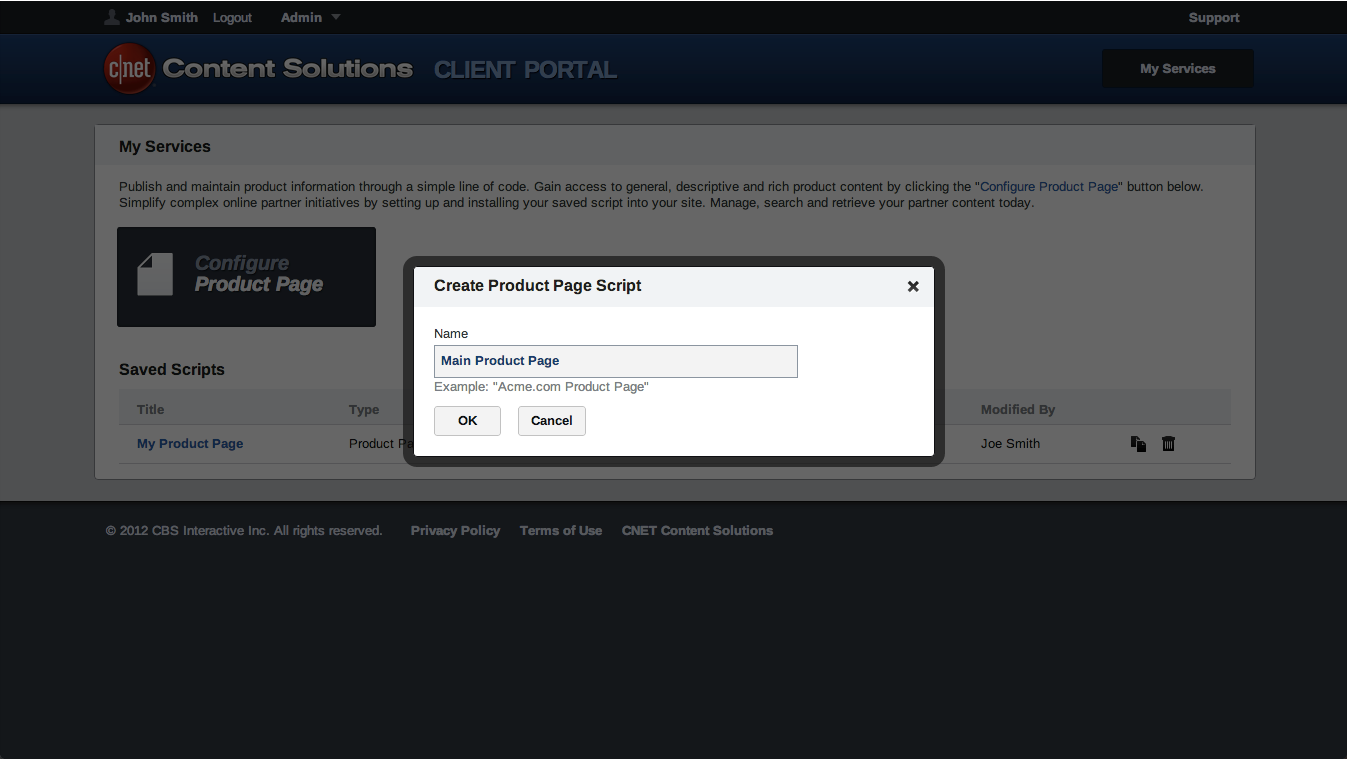
Choose a name for your page. For this demo, we have selected “Main Product Page” as our page name.
3.2 Configure Page
On the left side of the Configure Product Page screen, you'll see a number of different content elements. The SuperBlock™, a unique set of elements that make up the most common product page layout, has been preselected for you. We highly recommend you start with the SuperBlock for your initial testing purposes.
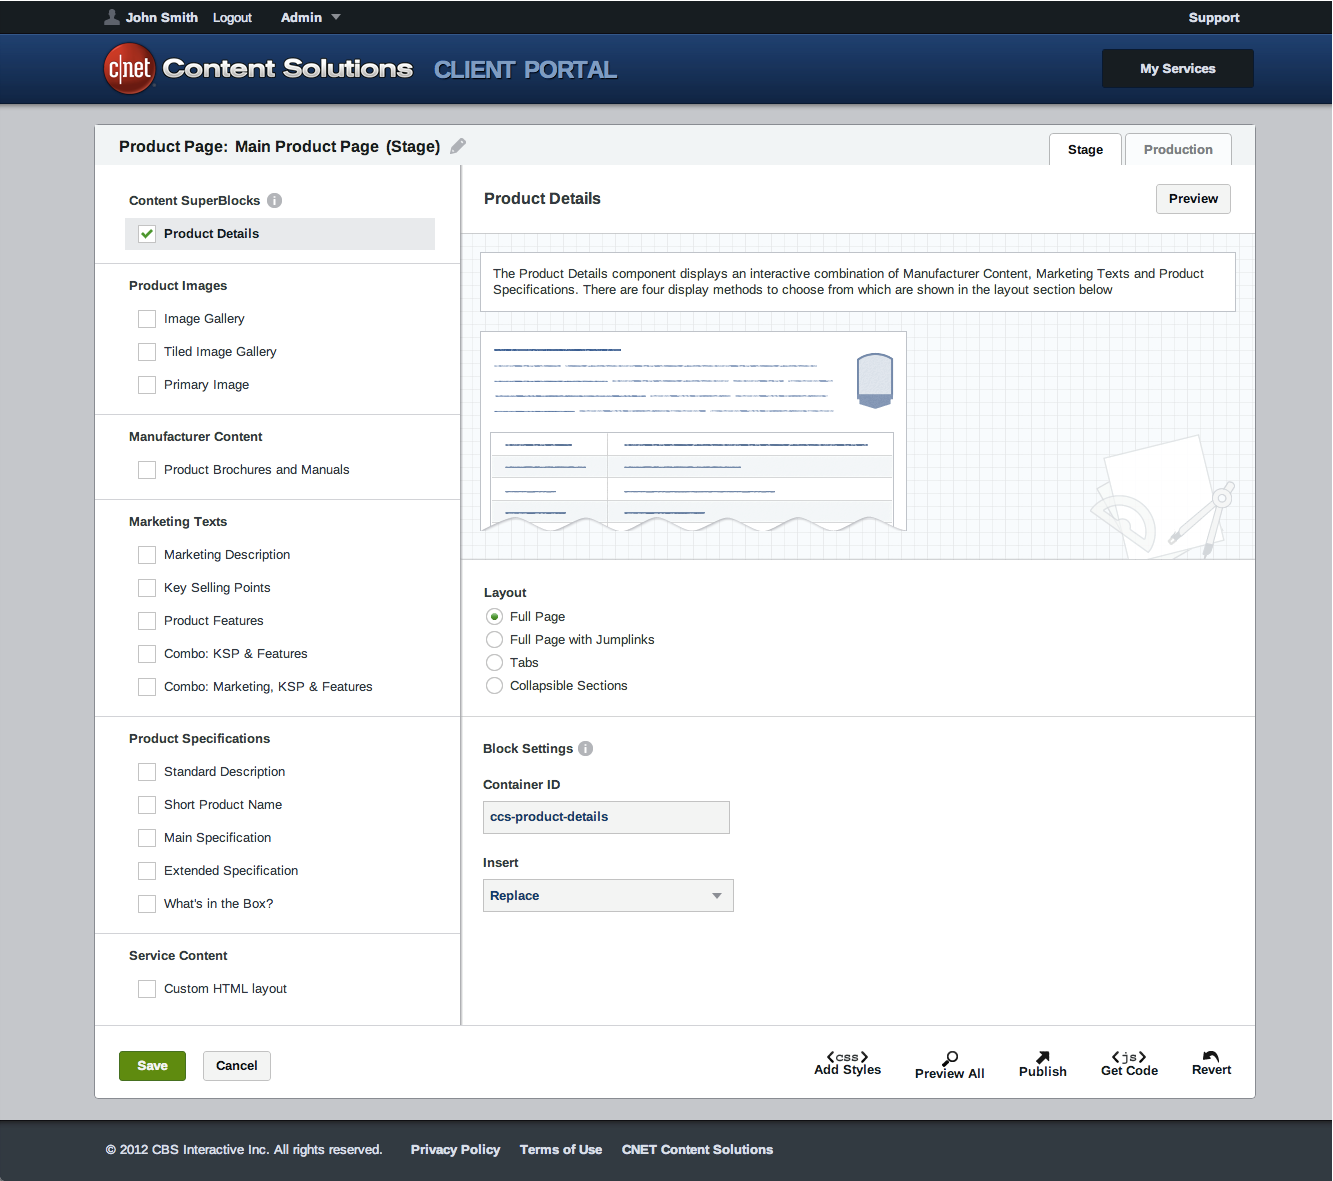
Under Layout, choose how you would like to see the content displayed on your product page.
Under Block Setting, you will see a pre-populated Container ID. This is the HTML element, such as a <div> or <span>, where the content will be delivered to your page. If you already have a <div> or <span> where you'd like the content to show up, you can replace the pre-populated container ID with the ID that already exists on your website.
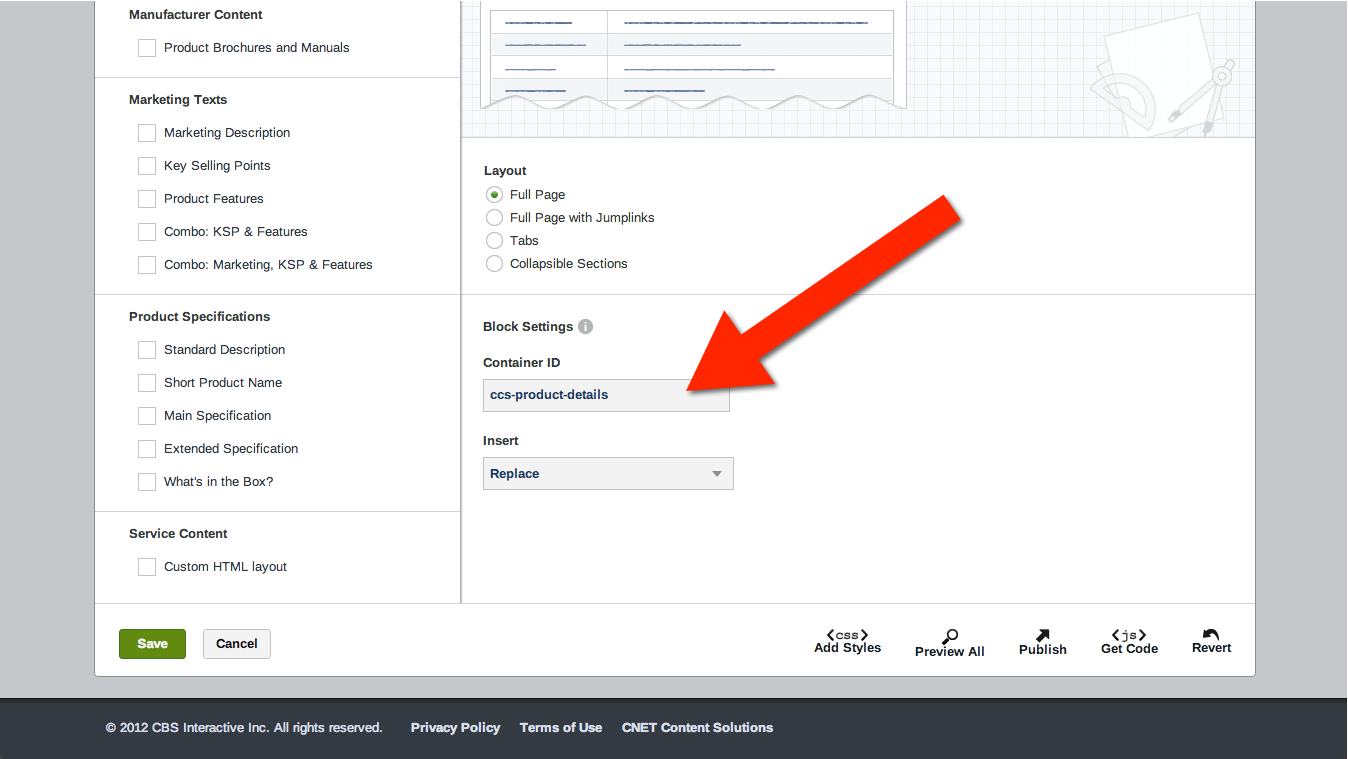
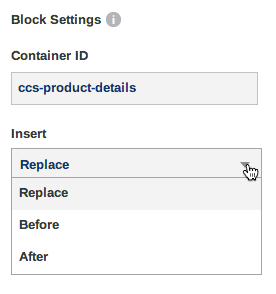
The options listed in the Insert drop down menu determine the behavior of the syndicated content.
- Replace: Syndicated content replaces content on your site.
- Before: Syndicated content is placed before content on your site.
- After: Syndicated content is placed after content on your site.
When content is returned, it will exhibit the behaviors specified in the Insert dialogue box. If there is no content returned, your page remains unaffected.
3.3 Get Code
If you are ready to integrate the content on your website’s product page:
- Click SAVE
- Click PUBLISH to push changes live.
- Click GET CODE
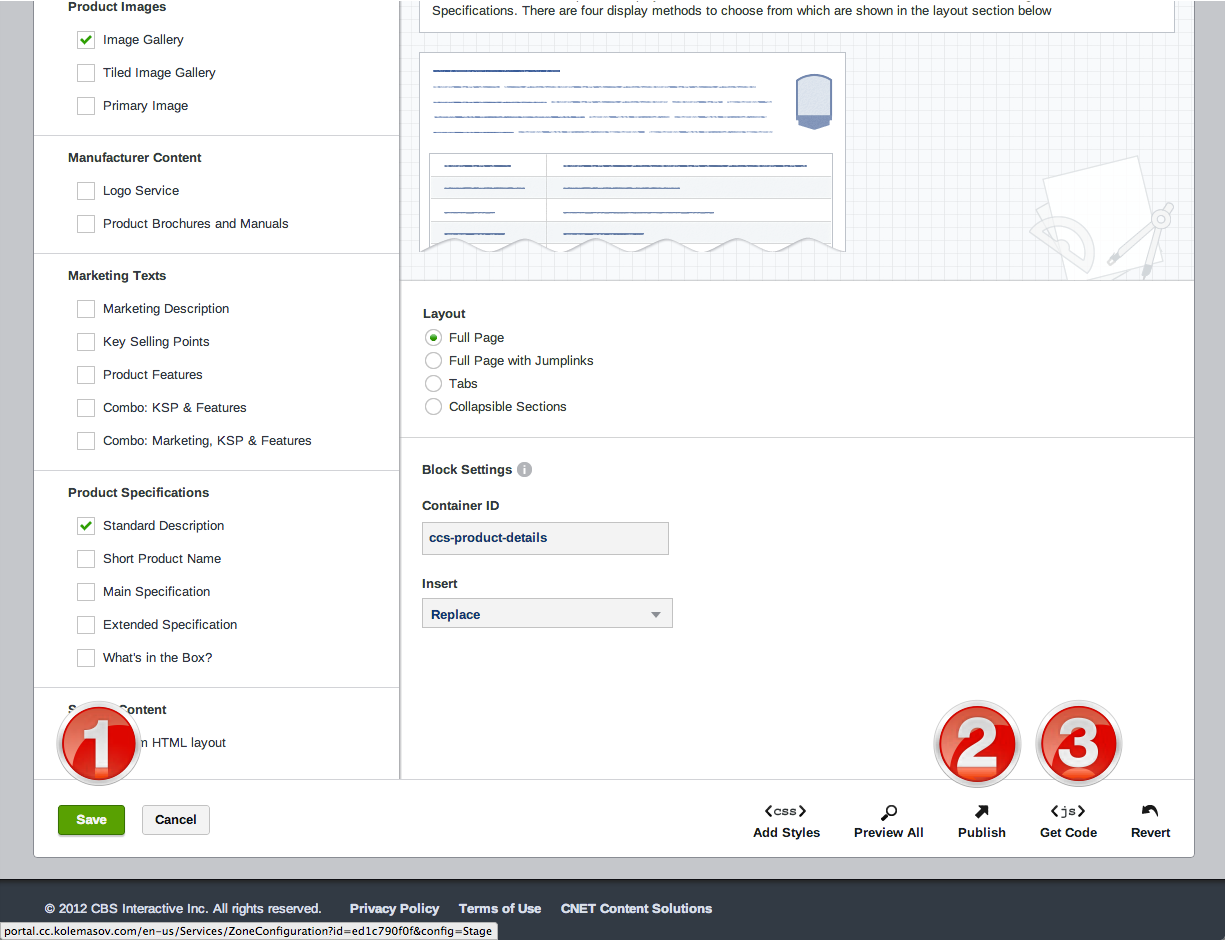
You will then be given example code to integrate.
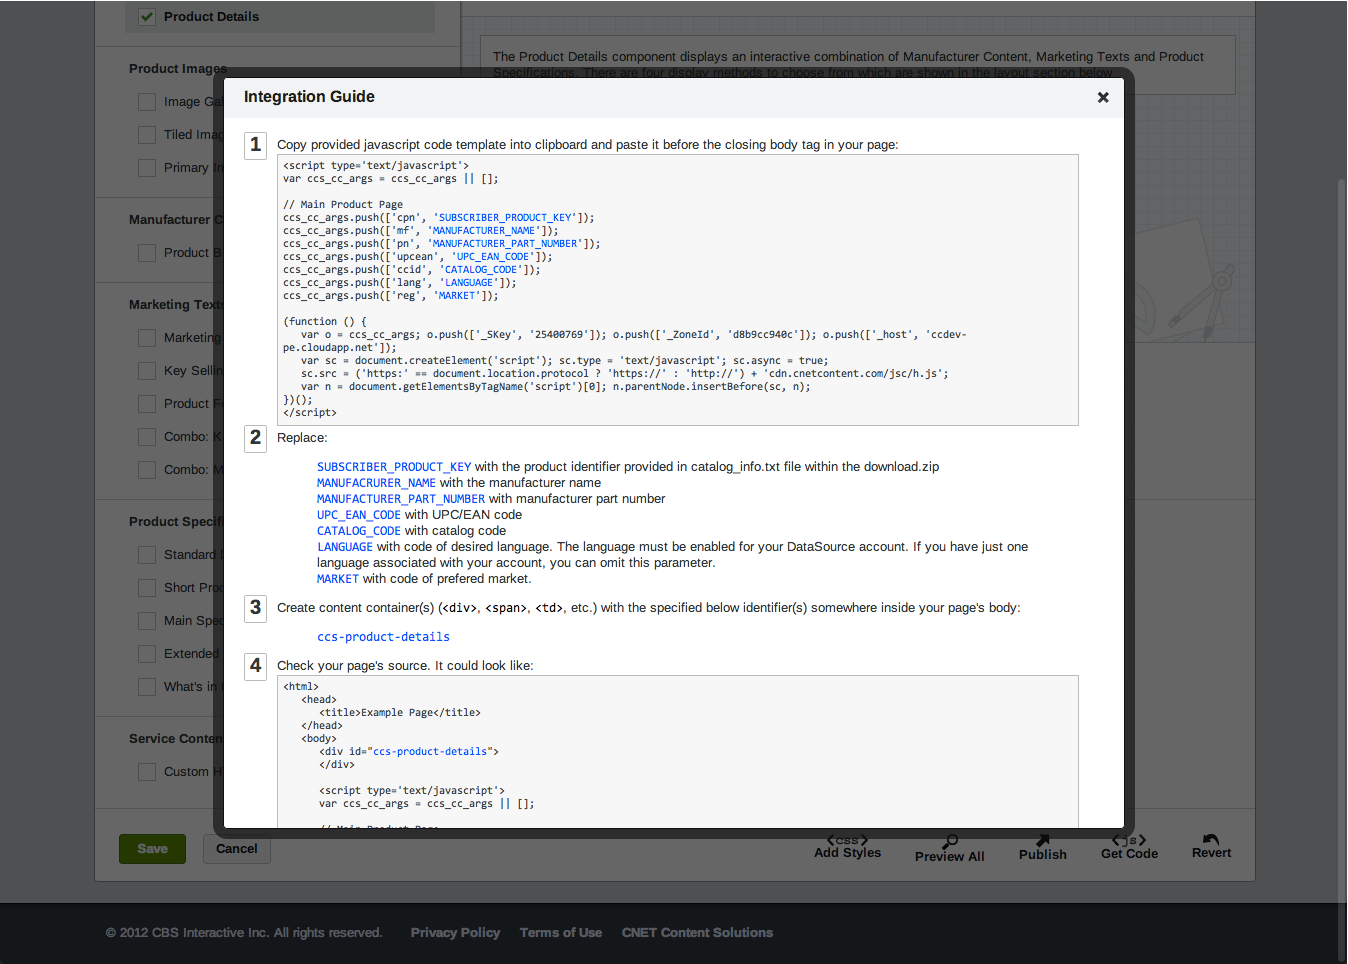
Step 1: Copy the example script to be placed at the bottom of your page.
Step 2: Update the parameters below with the dynamic values from your website.
- Mfr Name: The manufacturer name of the product. Example: Acme Computer.
- Mfr Part Number: The manufacturer part number. Example: “1234#ABA".
- Language: Two-letter language code that should be returned, based on what languages your account is subscribed to. Examples: en, fr, de
- Market: Two-letter country code. Examples: US, DE, GB
Note: You will only be able to request languages or markets enabled for your DataSource account.
Step 3: Simply place the <div> tags with the container IDs where you’d like them to appear on your product page.
Step 4: Contains sample HTML code.
CNET Content Solutions strongly recommends that whenever making a change to a website, you first test the integration in a staging environment before final code deployment.
And, with that, you’re up and running!
4. 4. Contacting Customer Support
If you experience any issues or have additional questions about the DataSource Cloud service or the Client Portal, please contact our Customer Support team at: